


Generator current maintenance
The generator set dealt with in this example is an 11 kW unit, which is frequently installed on our AMEL 55. However, whether it is a larger unit (up to 19 kW on the AMEL 64) or a smaller unit (7.5 kW on the AMEL 54), the design and the maintenance of these parts is identical.
An electrical generator set is composed of a diesel engine, in this case with 4 cylinders of 1500 cm3 and a generator. The engine is serviced like a classic diesel engine and therefore there is no secret thanks to our article on the servicing of your Volvo motor. Therefore, every 200h, or every 2 years, it is necessary to replace: the seawater pump impeller, the diesel filter, the oil filter, the oil and the anode. The latter is not found on the Volvo D3 and must be replaced every year.
The generator itself does not require any servicing; the only thing that must be remembered is that the 230V fuse is located on the side facing the stern of the boat. It may trip to protect the electrical generator set in the event of a short-circuit on the boat.
Therefore below is the classic 200h servicing procedure for an electrical generator set such as manufactured by ourselves.
Equipment required :
Tools :
- A can of over 5L for the oil change + 1 small can for the diesel
- An oil syringe (Jabsco hand pump) for emptying with various tubes
- Plastic bags to use during the removal of the filters
- Cloths
- Portable 24V lamp or equivalent
- Toolbox with Allen keys + ratchet set in inches
- Filter wrench
- Bucket with large rubbish bags
- Solvent cleaner
Supplies :
- 1 set of Onan filters
- 1 Onan anode
- 1 Onan seawater pump impeller
- 5 litres of 15W40 oil
Procedure:
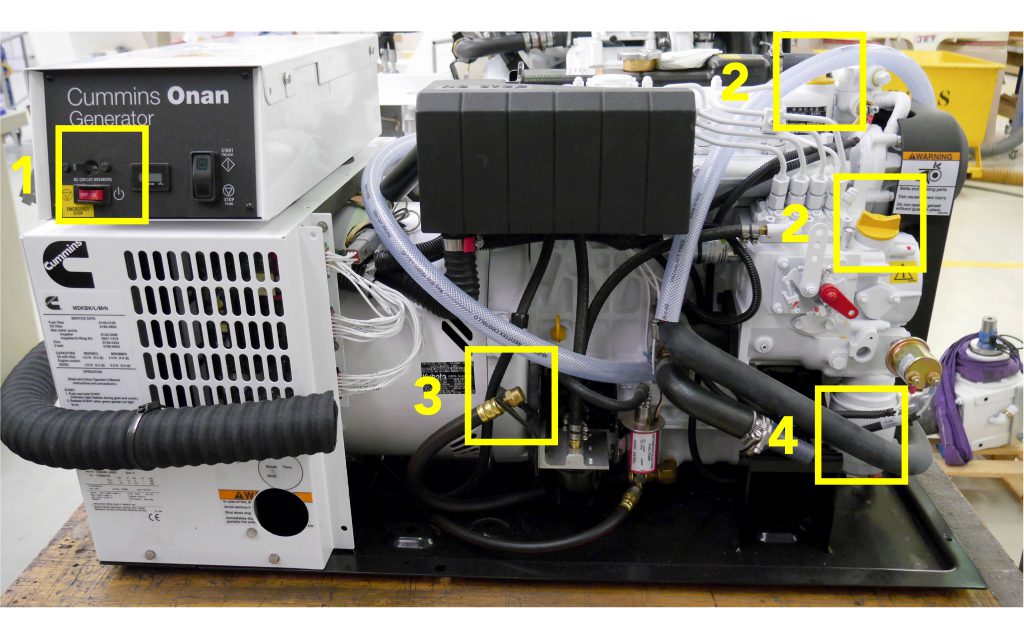
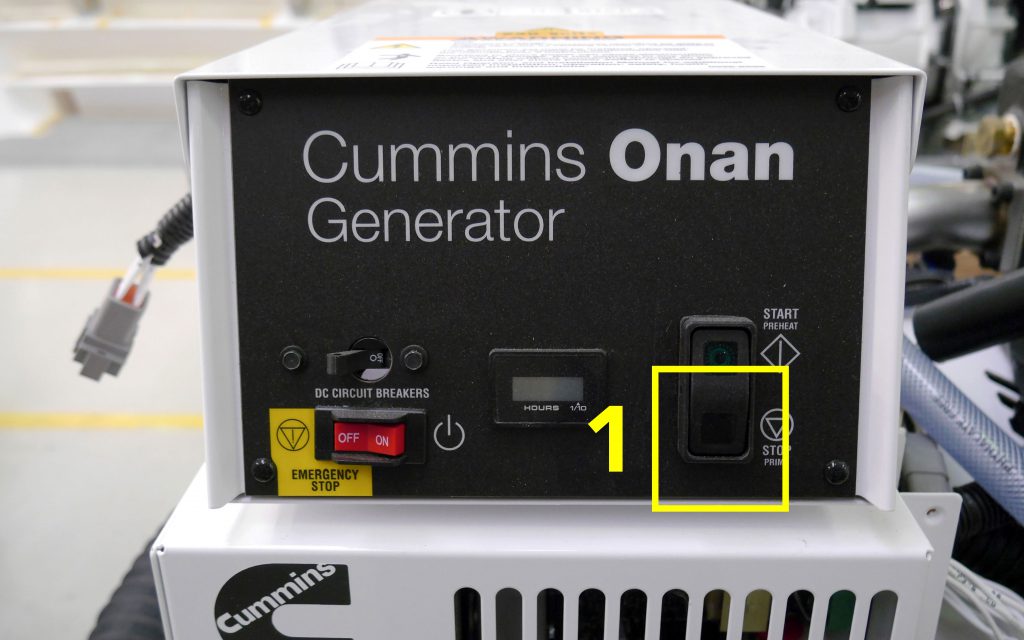
Firstly run the electrical generator set for several minutes in order to heat the oil and lower its viscosity. Remember then to turn-off the 2 12V switches on the generator (fig. 1) especially if the batteries have not been powered-off.
Oil :
- Open the oil filler plug (fig. 2, 2 plugs possible),
- Connect the hand pump to the drain tube and pump (fig. 3).
- Remove the oil filter, first using the wrench and then by hand as soon as possible and remove it into a plastic bag (fig. 4).
- In order to maintain access to the interchanger, wait until the end of servicing to position the new filter with a new oiled gasket, and screw it on by hand. Should the seawater pump impeller be damaged it may be necessary to look for parts of it in the interchanger.
- Close the drain tube. Then, once the oil filter is in place, fill with oil (about 4 litres) keeping an eye on the dipstick. A top-up will be necessary after the electrical generator set has been used as the filter will be full.
Seawater impeller :
This part involves inspecting, and if need be, replacing the seawater pump impeller. The anode must be replaced every year.
Seawater pump impeller
Removing the impeller :
It is located on the starboard side of the Generator above and to the right of the diesel pump.
- Begin by making sure that the seawater valve is closed and that the seawater box is empty in order to avoid water flooding as much as possible when the seawater pump is opened.
- Disconnect the two seawater inlet and outlet pipes from the pump (fig. 1)
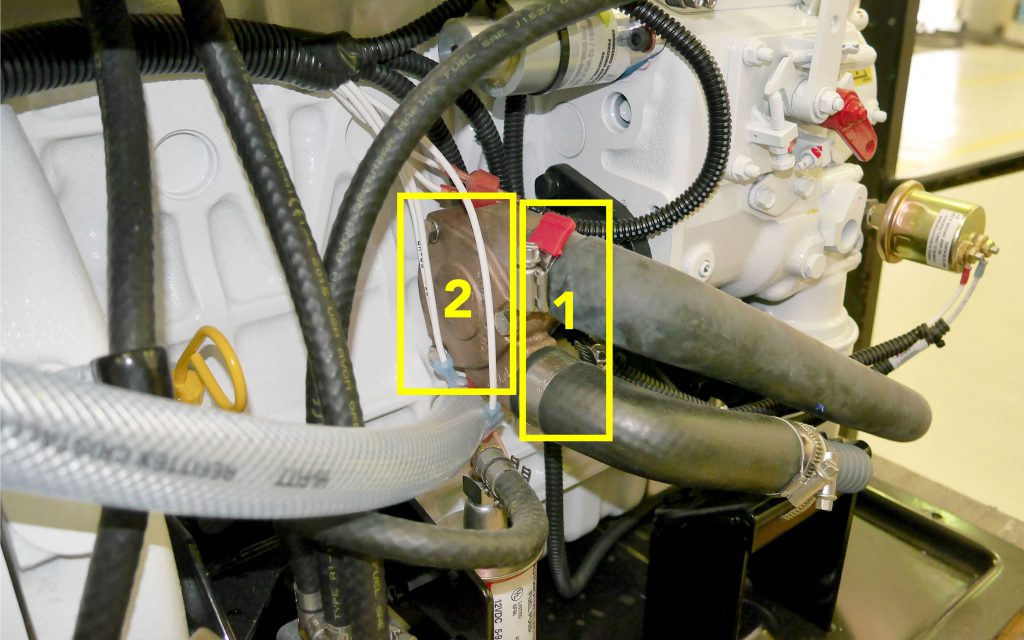
Loosen the 3 screws on the seawater pump casing (fig. 2)
The impeller comes out easily. Carefully check it visually as it is a fragile part. For example, you can compare it to a new impeller. Change it if there is the least doubt.
If the part is not whole, it must be restored before re-assembly. In fact, lost parts from the impeller are likely to damage other parts of the machine. The missing pieces are generally found in the interchanger which can be found by following the seawater pump outlet pipe. Then:
- Loosen the clamp of the inlet pipe to the interchanger
- Loosen the interchanger base plate to recover the pieces of the impeller blade using a small hook.
If, despite this, you do not find all the pieces of the impeller, others may possibly be found in the pipe linking the seawater filter to the seawater pump. Simply open the seawater valve, let a little water flow into a bucket and recover the missing pieces. If, once both checks have been made, and the damaged impeller is incomplete, the pieces must in all likelihood have passed through the interchanger and have reached the exhaust out of which they have been expelled. It is then possible to carry out re-assembly.
Re-assembly of the impeller :
- Place the new impeller in its casing after having greased the latter using your finger. Greasing helps to avoid breakage due to non-lubrication of the impeller during the seawater pump restart phase.
- Reposition the body of the pump using a new gasket and 3 screws.
- Replace the seawater inlet and outlet pipes and seal using blue paste.
- Before restarting the electrical generator set or reopening the seawater valve, replace the electrical generator set anode if necessary.
Replacing the generator’s zinc :
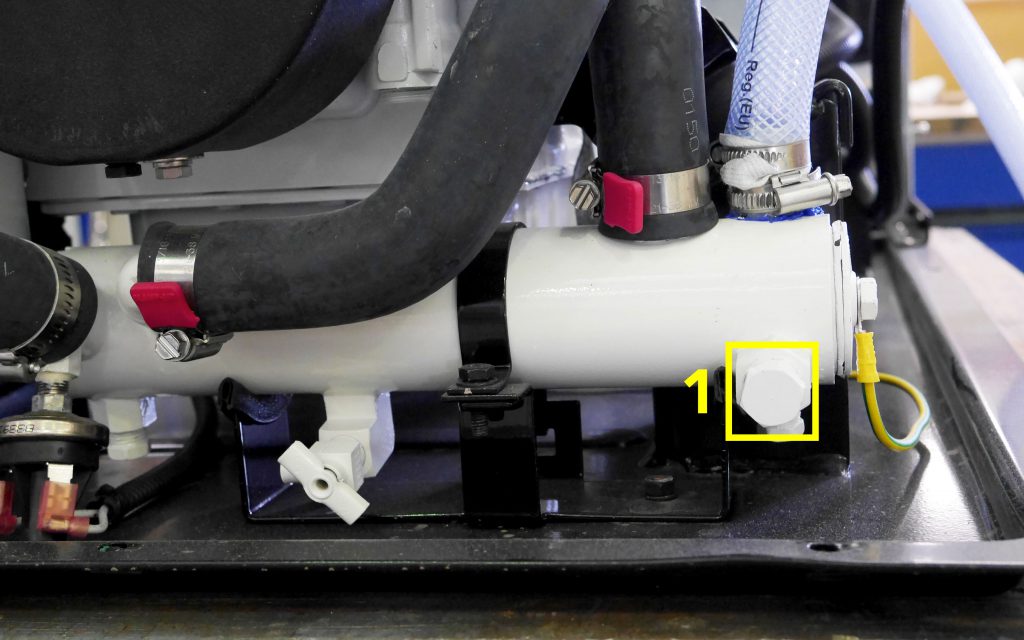
Loosening the existing anode using a No. 18 spanner (fig. 1) is sufficient. The anode is located, more precisely, on the side of the electrical generator set which faces the bow of the boat, below and to port. Reposition then the new anode and wrap several Teflon tape around the thread. This precaution will guarantee perfect watertightness.
Diesel circuit
- Protect the area below the diesel filter by covering it with a plastic bag.
- Loosen the diesel filter then using a filter wrench, then by hand (fig. 1). Empty it into a container intended for used diesel to be recycled later.
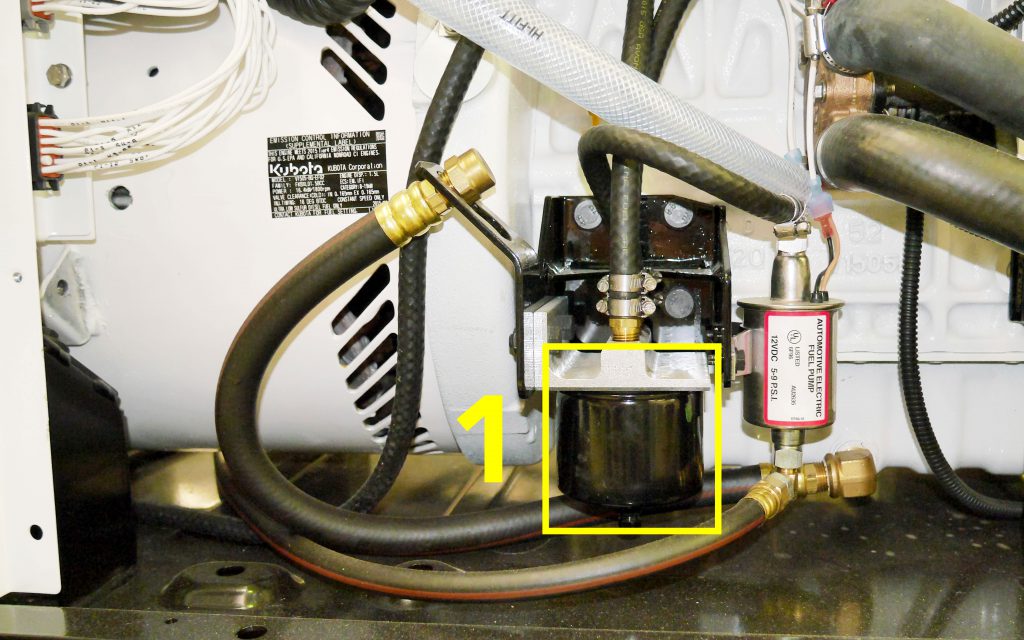
- Position a new filter with a new gasket, screw it on by hand and lightly tighten using a filter wrench to finish.
- Re-start the circuit by opening the drain valve (photo box on the left). Place a cloth below as the diesel will flow. Then start the diesel pump by pressing the start button in the stop position (photo on the right, fig. 1).
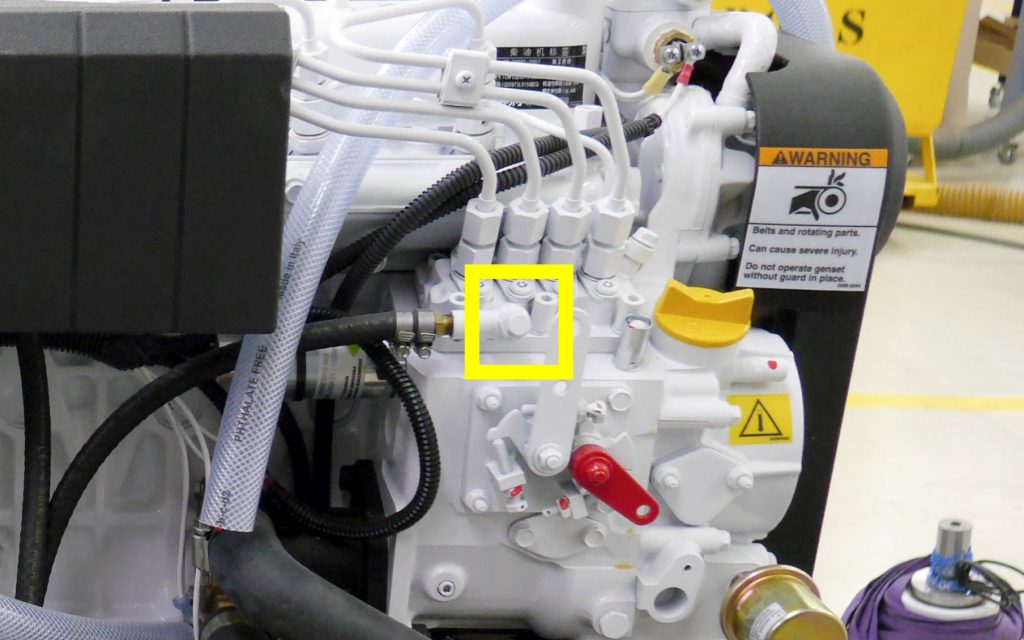
When the first jet of diesel, then an air bubble and finally, new diesel begins to spurt from the drain screw, return the screw. The operation is complete.