


Mechanical article : 200h engine service, case of 2nd Generation VOLVO D3-110

This engine must be serviced for the first time before 50h of use, and then every 200 hours. Servicing involves:
- Replacing the lubricating oil and filter
- Replacing the diesel filter
- Checking/replacing the seawater pump impeller
- Cleaning the inverter interchanger which supplies the seawater motor.
Maintenance of the inverter may be necessary. For more information on this see the mechanical article on the inverter.
If you are planning a long crossing ensure that your engine will run for more than the critical 200 hours. Calculate the time remaining before the next service and compare this with the sailing time to reach your destination. It is possible to carry out servicing earlier than planned in order to benefit from the 200 hours of running time if the time remaining does not suffice.
Equipement required :
Tools:
- A can of over 10L for the oil change + 1 small can for the diesel
- An oil syringe (Jabsco hand pump) for emptying with various tubes
- Plastic bags may be useful when removing the filters
- Cloths
- Portable 24V lamp or equivalent
- Toolbox with Allen keys + ratchet set in inches
- Filter wrench
- Volvo seawater-pump impeller extracting tool
- Bucket with large rubbish bags
- Solvent cleaner
Supplies :
- 1 set of Volvo D3 filters: diesel and oil
- 1 set of 20.10.104 separators
- 1 Volvo seawater pump impeller kit
- 6 litres of Volvo 15W40 oil
Preparation :
- Run the engines, with the clutch engaged, for several minutes in order to warm the oil
- Shut off the diesel inlets in the alleyway
- When working it is preferable to shut the batteries off, but here it is desirable to maintain the lighting.
- Shut-off the seawater inlet and empty the seawater filter in order to limit the water flowing out when checking the seawater pump impeller
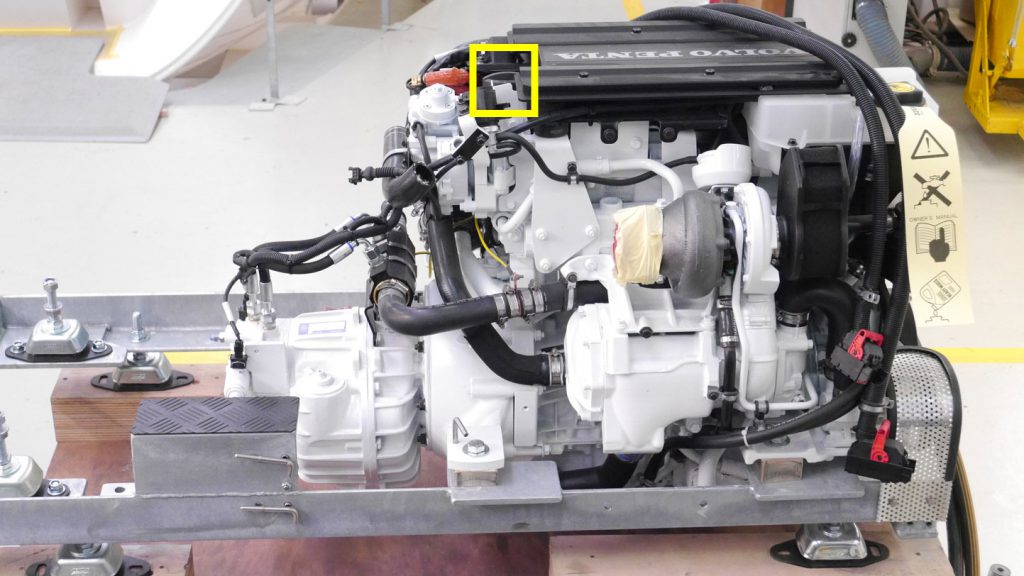
- Remove the plastic engine covers
- Protect the gas extinguisher trigger as it is very sensitive and a wrong move is easy to make. The risk of a cold burn or of asphyxia therefore becomes high.
Once these preparations have been made it is possible to proceed to the maintenance itself.
Engine Oil :
- Remove the oil filler plug.
 •
•
- Using the discharge pipe, and the supplied JABSCO hand pump, suck out all of the oil and then replace the plug.
- Loosen the cover of the filter cartridge, remove it and use the hand pump, with a suitable tube, to remove the oil remaining at the bottom of the tank.
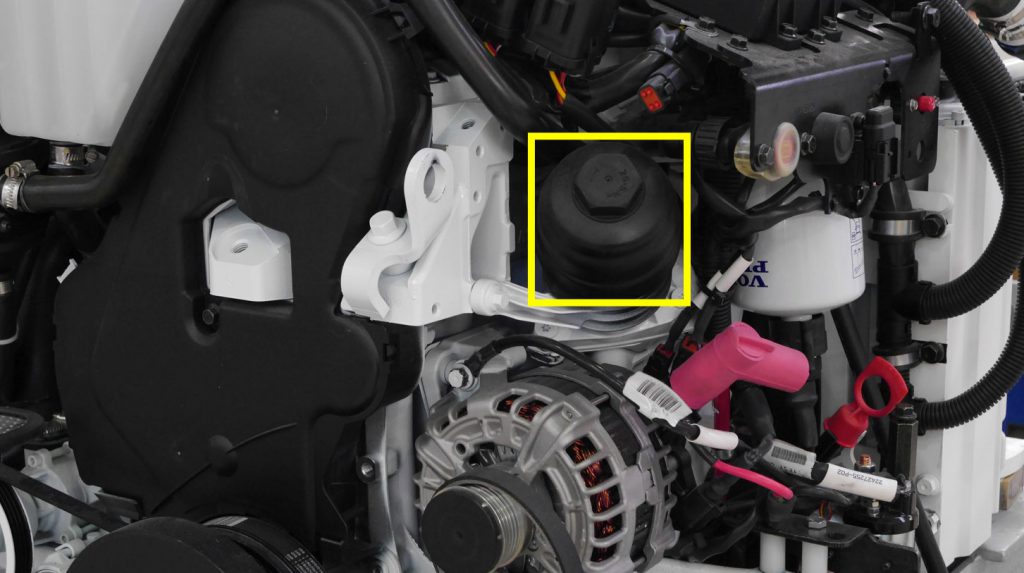
- Replace the filter cartridge and the gasket after having greased it using the waste oil. Tighten by hand + finish with a wrench.
- Fill with oil (+/- 5L) via the filler hole and check the level using the oil
Diesel :
The diesel circuit of the engine has 3 elements. The tank must be clean in order to store and distribute good quality diesel. The diesel separator pre-filters carry out the initial diesel filtering before distribution to the engine, to the electrical generator set and to the diesel heating, if the boat is equipped. Lastly, the engine is equipped with a diesel pump and filter.
For the maintenance of the diesel separator pre-filters, see the mechanical article “Racor diesel separator pre-filters”. Please note that a diesel separator filter must be changed every 500 hours (by adding the engine and the electrical generator set hours together).
Engine diesel filter :
You have cut off the diesel inlet beforehand using the valve situated in the alleyway.
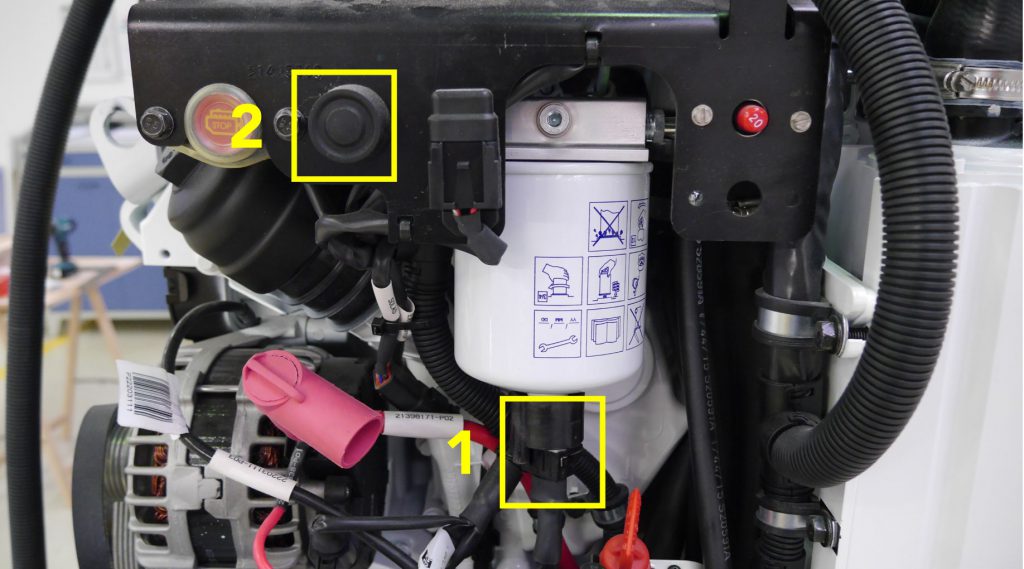
- Un-clip the water detector from the diesel filter (Photo below – fig. 1)
- Protect the bottom of the filter with a cloth/recovery container and wrap the filter in a plastic bag. Loosen the diesel filter using a filter wrench, then by hand. Be careful to not misplace the gasket. Empty the filter into a different container from that for the engine oil as this will enable you to re-cycle the diesel.
- Prepare a new filter by unscrewing the water sensor from the used filter and screwing it onto the new filter
- Install the new filter and ensure that the gasket is positioned correctly. Tighten by hand. Re-connect the water sensor.
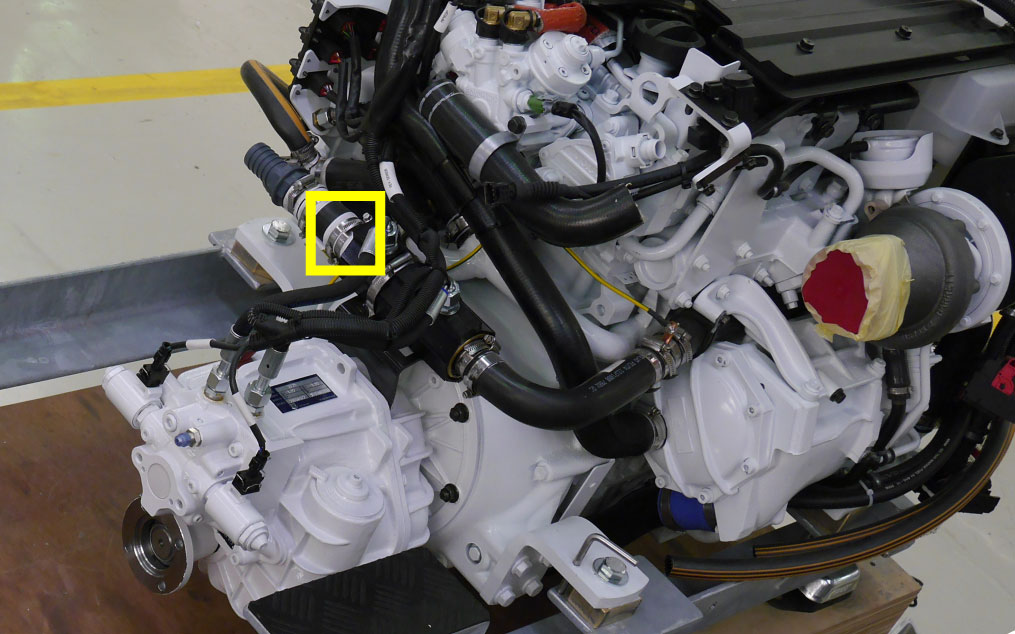
- Restart the diesel pump using the black button on top of the engine on the rear starboard (fig. 2). Stop actuating the pump when the noise intensifies and gives the impression that it is straining more than at the start.
Tank treatment :
Diesel is currently designed to remain stable for about 6 months. Our tanks contain about 900 litres of fuel for the AMEL 55. This may represent up to one year’s use. It is therefore highly recommended to treat the fuel and keep the tank full. In fact, for the most part, it is the presence of air which allows bacterial to develop. The product recommended by Volvo is Acti-Oil which creates an active bactericide film which lasts one year.
Seawater circuit :
Cleaning of the inverter interchanger :
- Other than the seawater filter which must be cleaned regularly, it is necessary to clean the inverter heat exchanger during each service.
- Loosen the pipe by the inverter inlet (on the starboard), then clean off the algae and bacteria deposits with a small metal hook. Then replace the pipe and fasten the clips.
Inspection of the seawater pump impeller :
This impeller must be checked visually and look new. It is found on the rear starboard part of the engine, at the bottom. Proceed accordingly:
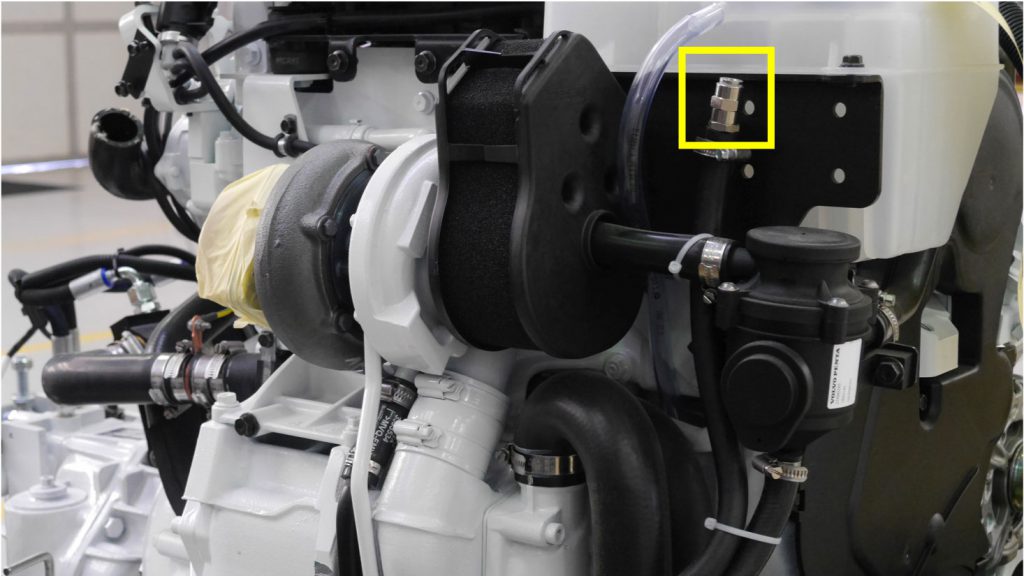
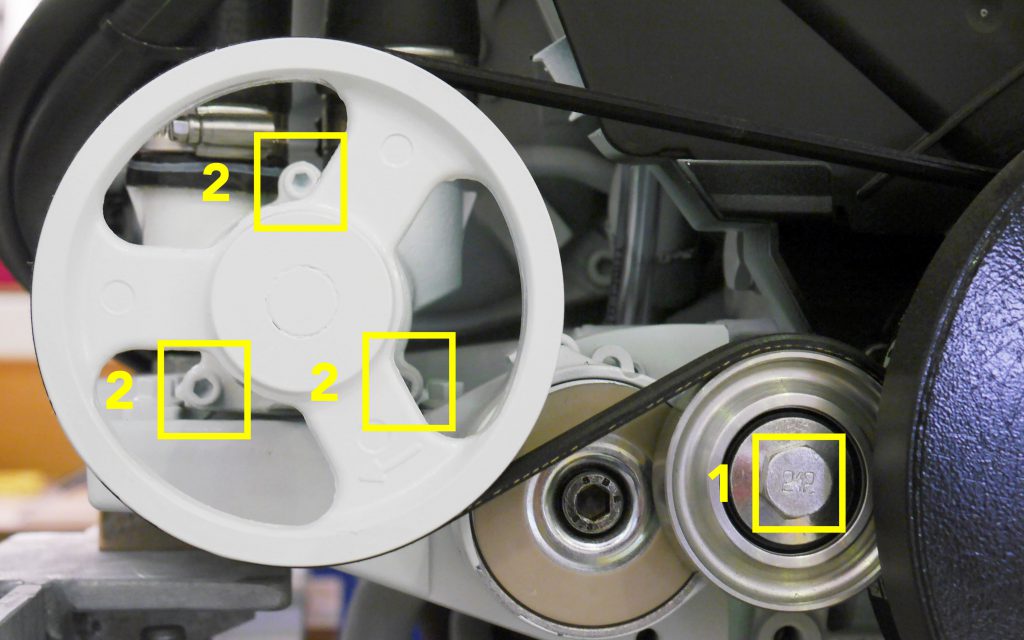
- Position the pipe or adjustable wrench on the belt tension pulley of the seawater pump (fig. 1) and use the tool as a lever on the tensioner. Keep the tensioner in a “relaxed” position and remove the seawater pump belt. It is then possible to loosen the 3 bolts (fig. 2) holding the casing of the impeller by passing an Allen key through the holes in the pulley.
- Remove the pulley. Screw the impeller extraction tool into the impeller and lift it out.
- Clean it and inspect it visually. If there are scratches or cracks, or even if in doubt, it should be replaced.
- O-ring
- Grease the receptacle of the impeller using your finger in order to ensure lubrication of the latter during the restart phase.
- Reassemble it in the reverse order of disassembly.