


Watermaker : Rinsing and Sterilization
We are going to precise here when and how to proceed to a rinsing or a sterilization of the watermaker. Let us remember first the basic principle of the utilization of a watermaker : the membranes must not be under pressure when they are full of fresh water. It damages them and reduces their lifetime. They are made to be used with sea water (which looks pretty logic for a watermaker isn’t it ?!). After a rinsing or a sterilization, it is therefore necessary to proceed to a starting in manual mode in order to run the watermaker at a minimal pressure during a few minutes so that it can be free from fresh water before beeing under pressure.
Rinsing with fresh water or sterilization ?
Rinsing or sterilization are not systematic and are necessary only if you will not use your watermaker for a certain period of time. A general rule is :
- If you will use your watermaker in the next 7 days, don’t rinse it, just stop it normally.
- If you will use your watermarker between one week and 4 months after its last start, you need to rinse it with fresh water
- If you will use you watermaker in more than 4 months, it is necessary to sterilize the membranes with a chemical sterilizer.
Rinsing with fresh water
This rinsing can be done in one of two ways : either with the rinsing valve in the engine room, or through the rinsing mode on the remote (in AMEL 55 and 64).
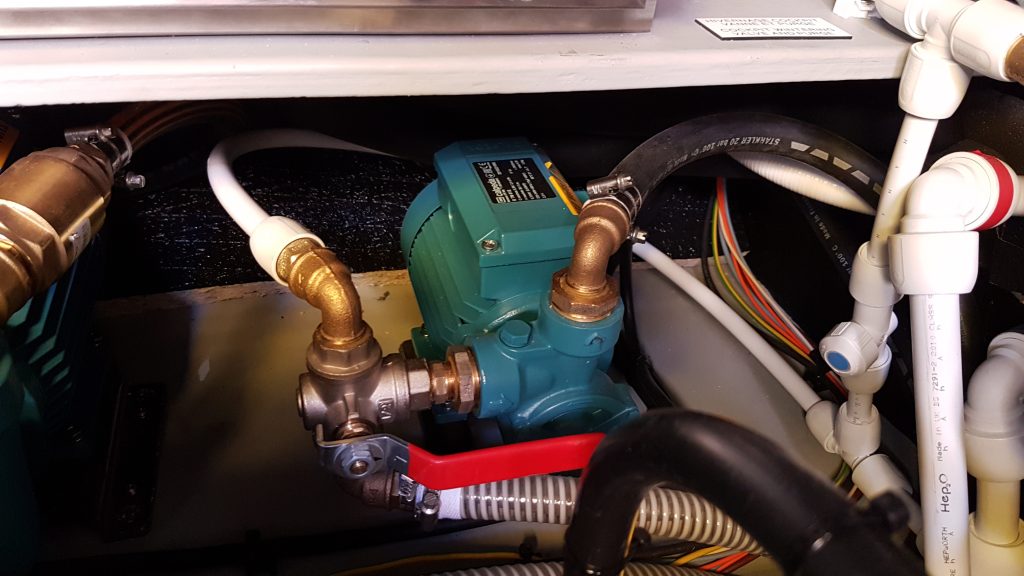
In the first case, you just need to stop the watermaker, make sure that the fresh water pump is on and that you have enough water in the fresh water tank. You can then turn the rinsing valve and wait 3-4 minutes. Then close the valve and the rinsing is over ! The picture of the valve is visible below :
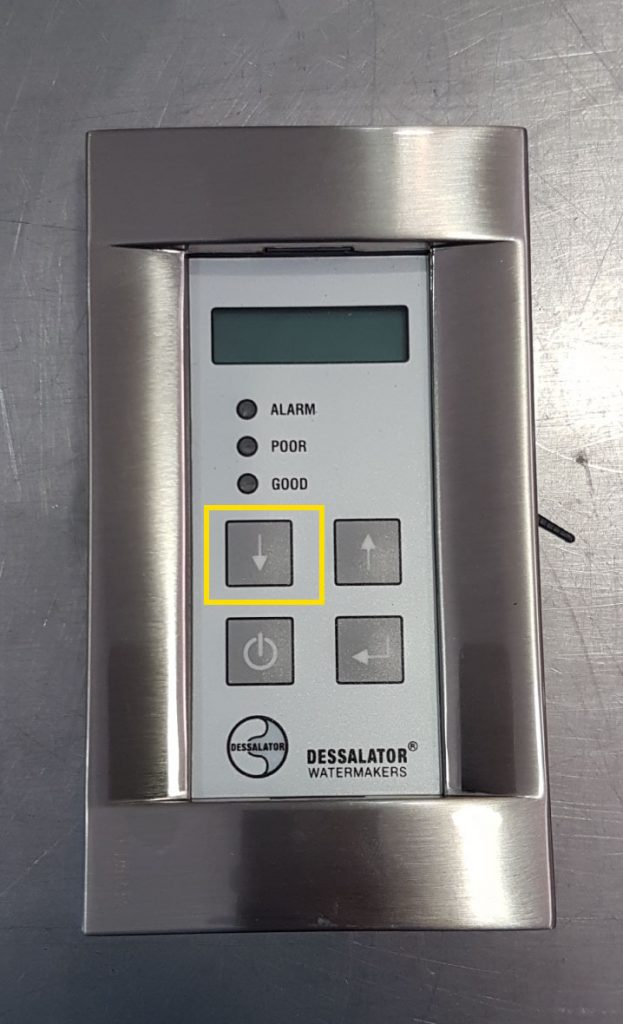
In the second case, the rinsing with the remote on the AMEL 55 and 64, you also need to check that your fresh water pump is running, and your tank contains enough water. When the watermaker is working, you just need to hit the “down arrow” buttons to stop the watermaker and launch a rinsing. The rinsing valve will open and then stop after 2 minutes. You can see a picture of the button below :
Sterilization of the membranes
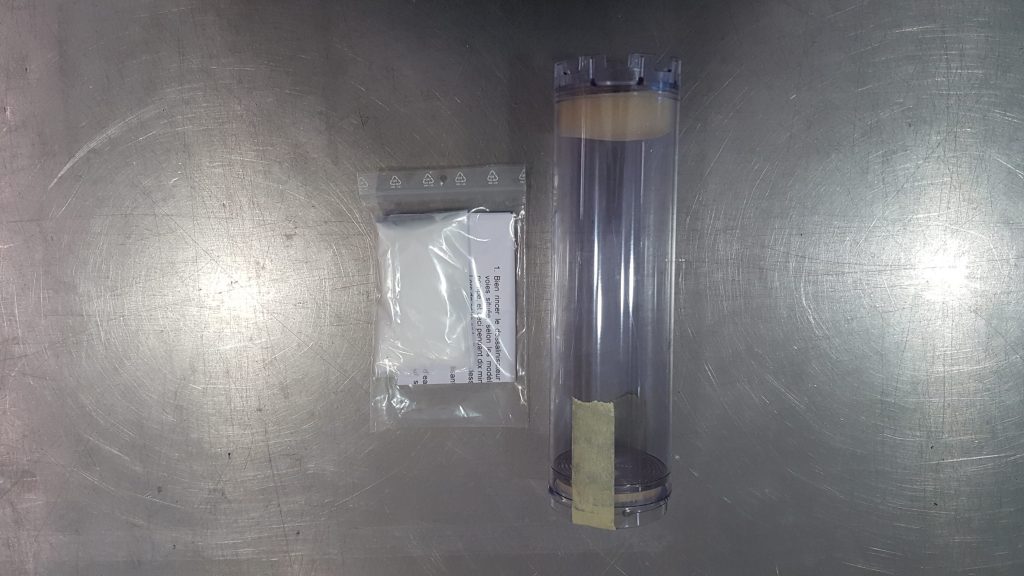
This process is similar to a classical fresh water rinsing except that you will add an operation. This operation is to add a product in the rinsing water, through a plastic cylinder which will take place instead of the first prefilter. You will have to put a dose of the sterilizer in the cylinder before.
You will need :
- A sterilization cylinder and its recharge
- A bucket
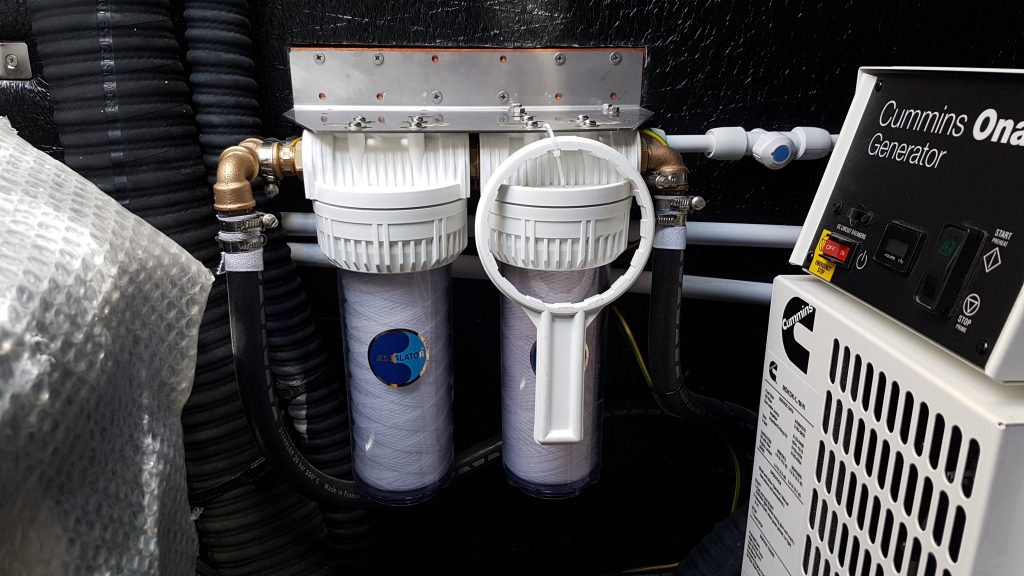
- And the prefilter key, used to unscrew the prefilter cover. It is in white on the picture below
Go in the engine room and proceed as a replacement of a prefilter :
- Rinse the watermaker with fresh water 2-3 minutes,
- Put the bucket below the prefilter and remove the cover with the key (the one one the right on the picture above)
- Empty the prefilter case, clean it with fresh water
- Place the cylinder in the prefilter case and screw the case. Watch out the seal and don’t screw the case too tight.
You can then proceed to the sterilization by opening the rinsing valve. Be aware that you need to check at the powder level in the cylinder. It will be fastly dissolved in the circuit. You need to keep a small amount of powder in the cylinder. If you rinse too long, all the powder will be evacuated to the sea, and the sterilization will not be effective.
This product is toxic, you will need to operate a long rinsing the next time you want to start your watermaker. The rinsing operation of this product is described in the article “Starting Procedure”